How to Sterilize Baby Bottles: A Step-by-Step Guide for New Parents
Learn how to sterilize baby bottles with this step-by-step guide for new parents. Explore all methods—boiling, steam, microwave, and chemical—plus tips and product recommendations for safe baby feeding.
Becoming a new parent is both exciting and nerve-wracking. You want nothing more than to keep your little one safe and healthy, especially during those late-night feedings. One of the first big tasks is learning how to sterilize baby bottles. Sterilizing bottles and nipples destroys harmful bacteria and helps prevent tummy bugs like diarrhea or vomiting. Milk and formula are perfect breeding grounds for germs, and newborns have immature immune systems that aren’t yet strong enough to fight off every germ. Ensuring each feeding bottle is clean and sterile is a key part of safe baby feeding, giving both you and your baby peace of mind. This friendly guide will walk you through why sterilizing is important and how to do it, step by step, using all the common methods.
Why Sterilizing Is Important
Babies under one year are especially vulnerable to infections. Since they can’t tolerate big doses of germs, even tiny amounts left on a bottle or nipple can make them sick. Sterilizing protects your baby against infections by killing bacteria, viruses or fungi that might linger on feeding equipment. Even if bottles and teats look clean, they might still carry germs. Sterilizing gives an extra layer of protection beyond regular washing, helping to ensure safe baby feeding.
Key Point: Sterilizing baby bottles (and any parts that touch milk or formula) is recommended at least up to your baby’s first year, especially for newborns or if anyone in the house is sick. After feeding or before first use, it’s safest to sterilize to kill any lurking germs.
Cleaning Bottles Before Sterilizing
Before you ever sterilize, clean the bottles thoroughly. Sterilization won’t be fully effective if milk residue remains. Start by hand-washing in hot soapy water (or use a dishwasher). Use a bottle brush to scrub the inside, including the threaded areas and the nipple holes. Squeeze soapy water through the nipple to clear out any trapped milk. Then rinse everything very well under running water. Clean every part separately, and even wash your bottle brush often. Once a bottle is clean, rinse it and it’s ready to go into your chosen sterilizer.
Step: Separate all parts (bottle, teat/nipple, rings, caps) and wash in hot, soapy water.
Rinse: Thoroughly rinse each part under running water to remove soap and milk.
Dry: Let items air-dry on a clean towel or rack. (Do not dry with a kitchen cloth or towel, as that can reintroduce bacteria.)
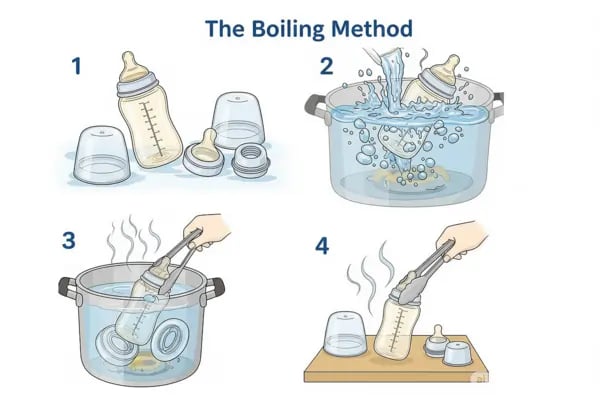
1. Boiling Method
Boiling is the most traditional method and doesn’t require special gear (just a big pot!). Follow these steps exactly:
Place all the clean, disassembled bottles and parts into a large stainless steel saucepan or pot. Do not stack them; arrange so water can cover everything.
Fill the pot with enough water to fully submerge all items, with an inch of water above the highest piece.
Make sure there are no air bubbles trapped inside the bottles or nipples – gently squeeze them as they fill with water.
Cover the pot with a lid and bring the water to a rolling boil. Once boiling, let it continue for at least 5–10 minutes.
Turn off the heat and leave the items in the water until you need them. Let them cool in the water before removing.
Use clean tongs to lift out the sterilized parts, draining away excess water. Place them on a clean, sterile rack or a clean dish towel to air-dry.
Safety Tips: Always set a timer so you don’t forget boiling water on the stove. Be very careful when removing hot items. Over time, the high heat can wear out nipples, so regularly check for cracks or thinning.
Why It Works: Boiling kills nearly all germs in just a few minutes. This simple method has been used for generations. Many home nurses or new parents start by boiling bottles because it’s cost-free and effective.
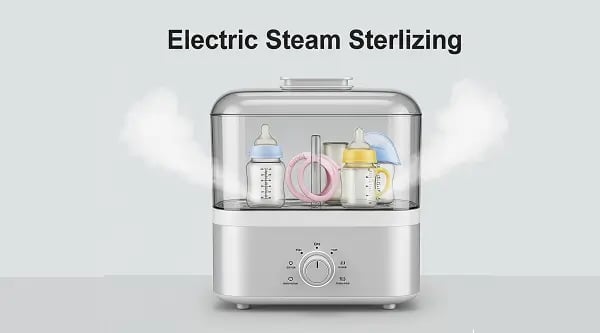
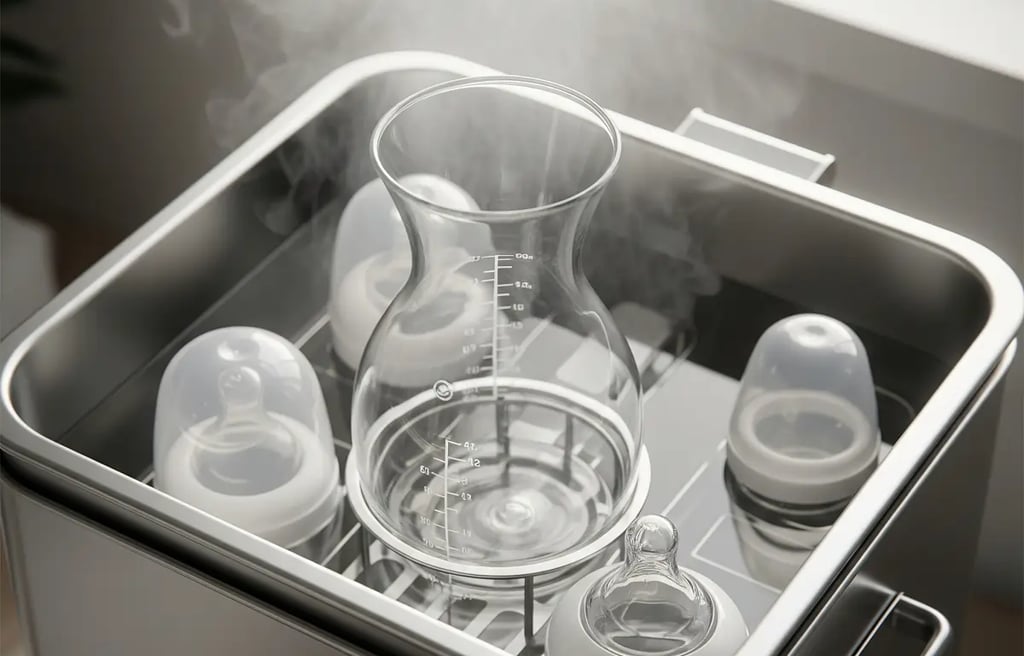
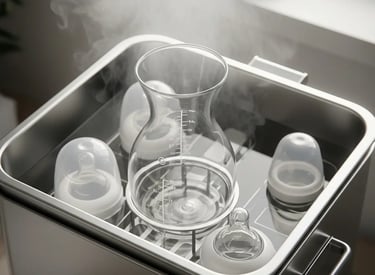
2. Electric Steam Sterilizer
Electric steam sterilizers are convenient countertop devices that use hot steam to sterilize multiple bottles at once in minutes. They heat a small amount of water to create steam, which circulates around the bottles to kill bacteria.
Electric steam sterilizers (like the Philips Avent Baby Bottle Sterilizer & Dryer Premium) can rapidly kill germs with hot steam. They often hold up to 4–6 bottles at a time and can finish a cycle in under 10 minutes. Some units also include a drying function or a storage lid, keeping bottles sterile for up to 24 hours if unopened.
How to Use:
Add the recommended amount of water into the base of the sterilizer.
Load the clean bottles, teats, rings and caps into the sterilizer. Place them upright and leave space between items so steam can circulate.
Close the lid and turn on the unit. Most electric sterilisers run a 6–15 minute cycle.
When the cycle finishes, you can either leave the bottles sealed inside or open it and remove items with clean tongs.
Product Tips: Many parents swear by the Philips Avent Electric Steam Sterilizer. Tommee Tippee and Munchkin also make popular electric steam sterilizers. Whichever brand you choose, follow safety guidelines: always add exactly the amount of water recommended, and clean the unit regularly to prevent lime buildup.
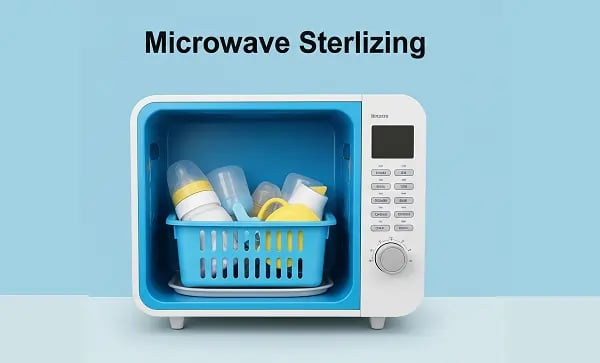
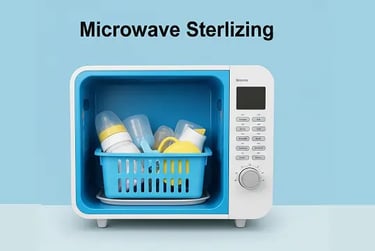
3. Microwave Sterilization
Microwave sterilizers (either plastic containers or special steam bags) let you use your microwave to generate steam. This is a quick, portable method especially handy when traveling.
Use a microwave steam sterilizer container or a steam bag designed for bottles.
Add the specified amount of water to the sterilizer. Place the bottles and parts inside, upright and not touching.
Seal or close the sterilizer, then microwave on high for about 4–6 minutes.
Let it sit briefly after microwaving to cool down. Open carefully to avoid scalding steam.
Remove items with sterilized tongs and let them air-dry.
Microwave sterilizers heat water fast and do a great job. They typically kill germs in just a few minutes. They are great for tight spaces or travel – just pack the microwave sterilizer or steam bags. Always follow the instructions on your chosen microwave sterilizer to ensure you add the right amount of water and heat time.
Quick Facts: Microwave methods achieve the same germ-killing effect as boiling or electric steam. They are great for small kitchens and travel.
4. Cold-Water (Chemical) Sterilization
Cold-water sterilization uses a chemical solution to kill germs at room temperature. This is handy if boiling or electricity isn’t available, like during travel or power outages. Common products include Milton Sterilising Tablets, Dettol tablets, or Johnson’s sterilising fluid.
Start with freshly boiled and cooled water or clean tap water. Pour into a clean container.
Add the correct dose of sterilizing tablet or solution. Stir gently to dissolve.
Submerge the clean bottles and parts, making sure no air bubbles are trapped.
Leave the items immersed for at least 15–30 minutes.
Remove with tongs or let them drip-dry. You do not need to rinse them.
The solution is effective for 24 hours, after which it must be replaced.
Cold-water sterilizing is gentle on bottle materials and convenient. Milton tablets are a go-to for many parents. Remember to use fresh solution daily and store chemicals safely.
Tip: This method is ideal for traveling. Pack tablets and a collapsible container and you’re ready to sterilize anywhere.
Helpful Tips and Best Practices
Keep it Clean: Wash your hands before handling sterilized bottles. Use sterile tongs whenever possible.
Leave Lids On: Assemble bottles immediately after sterilizing to avoid contamination.
Safe Storage: Sterilized bottles can stay in a closed sterilizer for up to 24 hours.
Inspect Equipment: Check bottles and teats regularly for cracks, wear, or cloudiness.
Dishwasher Caution: Dishwasher cleaning isn’t always enough. Always follow up with sterilization for newborns.
When to Sterilize: Sterilize bottles daily at least up to 12 months of age. Premature or sick babies may need longer.
Use Clean Water for Formula: Boil and cool water before using it to mix formula.
Stay Relaxed: This task will become easier over time. Focus on keeping things clean and safe, not perfect.
Wrap-Up
Sterilizing baby bottles might seem like a lot at first, but once you find a routine it quickly becomes second nature. Whether you’re boiling on the stove, using a steam sterilizer, popping bottles in the microwave, or soaking in a cold-water solution, each method works when done right.
Remember that sterilize baby bottles isn’t just hygiene jargon – it’s an important step in safe baby feeding. You’re not just cleaning, you’re protecting your newborn’s health. There are multiple baby bottle sterilization methods to choose from, so pick what fits your lifestyle and budget. Popular tools like the Philips Avent Electric Steam Sterilizer or Milton Sterilising Tablets can make the job easier.
New parenting involves learning many new tasks, but sanitizing bottles is one you’ve now mastered. With bottles properly sterilized, you can focus on the most important thing – enjoying those sweet feeding moments with your healthy baby. Stay confident, stay safe, and happy feeding!